MInecraft Maths – Surface Area and Volume

minecraft-logo


Image Source

Games based learning has been a hot topic in the last year or so and one of the most popular games in educational use has been Minecraft. Although there has been some debate about the value of learning outcomes, many students would agree that Minecraft is a fun way to learn about surface area and volume. This YouTube video, “Minecraft Math – Surface Area and Volume” describes how to calculate the surface area of rectangular prisms and challenges the viewer to calculate the surface area and volume of a huge tower of TNT blocks! Another YouTube video, from the same user, demonstrates the “Volume of Prisms and Pyramids” in Minecraft and offers a challenge to calculate the area of a prism with a pyramid on top.

We spent last lesson looking at the volume and surface areas of various patterns of ‘minecraft’ blocks. Our assumption is that each Minecraft block is 1m x 1m x 1m – a cubic metre. Next lesson I would like you to create your name in Minecraft blocks and measure the volume and the surface area of your construction. Start by using the first letter of your first name. It should be a minimum of five blocks high and three blocks wide. Make sure you take a screenshot of your construction and send it to me by email.
Euler’s Formula

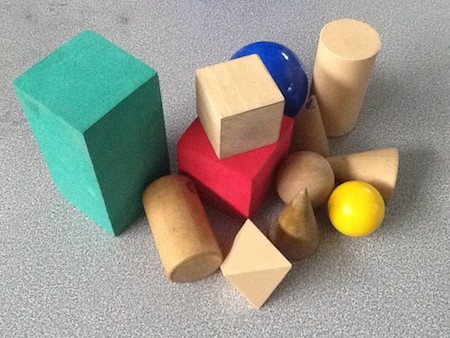
prisms&pyramids

Learning Intention: Students will investigate Euler’s rule that describes the relationship between the number of faces, the number of edges and the number of vertices of 3D objects.

Success Criteria: Students will create 3D shapes using toothpicks and jelly-lollies to represent edges and vertices. They will then count and record in a table the faces, edges and vertices of the shapes and investigate Euler’s Rule.

Today we are going to learn more about 3D shapes and investigate a special relationship between the number of vertices, edges and faces of such shapes. Create the following shapes using toothpicks and jubes:

  1. tetrahedron
  2. triangular prism
  3. square base pyramid
  4. cube
  5. pentagonal pyramid
  6. pentagonal prism
  7. hexagonal pyramid
  8. hexagonal prism

Now draw a table with six columns that records the name of the polyhedron, the name of the base shape, the number of sides on the base shape, the number of faces, number of vertices and number of edges. Complete the table for each of the 8 shapes listed above. Now see if you can work out any relationship between the values in your table.


Tessellations

mosaic_tiles

Image source

Learning Intention: “Describe translations, reflections in an axis, and rotations of multiples of 90° on the Cartesian plane using coordinates. Identify line and rotational symmetries.” “Define congruence of plane shapes using transformations.”

Success criteria: Students will create a design that shows various transformations of a 2D geometric shape and be able to describe the translations, reflections and rotations that have taken place to form a tessellation.

Tessellations have been popular decorations for hundreds of years, as this tiled ceiling of the Sheikh Lotfollah Mosque in Iran (1602-1619) shows. Any shape or shapes that can be repeated to fill a 2D plane can be considered tessellations; so, equilateral triangles, squares, rectangles and hexagons are all simple shapes that can be tessellated.

Maurits Cornelis Escher (1898-1972) is one of the world’s most famous graphic artists. His art has been reproduced extensively, especially his ‘impossible structures’ and his tessellations. You may have seen some of his work in your art classes. This YouTube video, Escher’s Tessellations,  showcases some of his work.

We are going to create our own tessellations using one of the following methods.

1. Create a Tessellation using the paper-cut method (YouTube)

2. How to make an Escher-esque Tessellation (YouTube)

3. How to create a Tessellation (YouTube)

This fantastic site, Tessellations.org, has lots more examples of tessellations and describes different methods for creating your own, including a praying mantis design submitted by an Australian student. I would love you to create a design that you are really proud of that you can also submit to the site.

Geometry – shapes and objects

polyhedra

Image Source

Learning Intention:

  • Students will be able to identify and describe 2D shapes and understand the terms translation, reflection, dilation and rotation.
  • They will be able to identify and describe, draw, plan and construct 3D objects.

Success Criteria:

  • Students will complete a poster that shows various shapes undergoing transformations and construct a tessellation from appropriate 2D shapes.
  • They will identify and describe 2D and 3D shapes from photographs.
  • They will draw isometric drawings with dot paper and nets and construct 3D shapes.

So far we have learnt about the properties of polygons, especially triangles and quadrilaterals,  in terms of their sides, angles, perimeter and area. Next we will be looking at TRANSFORMATIONS – how 2D shapes are translated (moved), reflected, rotated and dilated. Your task is to create a poster that shows the letters of your name undergoing each of the following transformations – translation, reflection, rotation and dilation. Draw two copies of each of four block letters of your name and then complete a transformation with one of the letters of each pair.

Screen Shot 2013-08-20 at 10.34.49 AM

We will then learn more about 3D shapes and how they are drawn and constructed.

Polygon matching game – identifying 2D shapes.

Sort the shapes – identify and describe polygons

Polygon sorting – regular and irregular polygons.

More interactives from the Maths Zone (2D shapes)

Classifying 2D and 3D shapes – Geometric Figures Game

Drag and drop 3D shapes – Naming 3D shapes

Matching 3D shapes – identifying 3D shapes

More interactives from the Maths Zone (3D objects)

Area of Composite Shapes

House_plans

Learning Intention: “Establish the formulas for areas of rectangles, triangles and parallelograms and use these in problem solving. Recognise and solve problems involving simple ratios.”

Success Criteria: Students will be able to calculate the area of various 2D shapes, including triangles, squares, rectangles and composites of these shapes. They will draw a house plan to scale and calculate the floor area of the house.

Homework: Measure the length and width of your bedroom and one other room in your house in meters. Notice that your doorways are about 1.0 meter wide.

Today’s task is to draw a scale plan of a holiday house. A rough estimate of the cost to construct a home is at least $1,000 per square meter. Your budget is $250,000, so the house must be less than 250 square meters in area. Use a scale – 1.0m to 1.0cm is a good way to start. So, 1.0cm on the plan, represents 100cm (1.0m) on the ground. Your scale is 1:100. Your holiday house should include the following rooms:

  • Lounge/Living area
  • Kitchen
  • Bathroom
  • 2 Bedrooms
  • Laundry


Area of a triangle

area_of_triangles


Image Source

Learning Intention: To understand how to calculate the area of a triangle and why the formula (A = 1/2 x base x height) works for all triangles.

Success Criteria: Students will complete the interactive “Area of Triangles” activity with at least 80% of answers correct.

Angles

triangles

Image source

Learning Intention: “Demonstrate that the angle sum of a triangle is 180° and use this to find the angle sum of a quadrilateral.”

Success Criteria: Students will draw 2 copies of each of the triangles (acute, right-angled, obtuse, equilateral, isoceles and scalene) and show how, when the corners are removed, they can be placed on a straight line to form 180 degrees. This demonstrates that the sum of angles in a triangle is always 180 degrees.

This term we have started a new unit of work, learning how to estimate and measure angles. We have also identified and named triangles according to their side length and angles. Make sure you can identify and draw each of the following:

  • equilateral triangle (three equal angles)
  • isoceles triangle (two equal side and two equal angles)
  • scalene triangle (three different angles and three different side lengths)
  • acute angled triangle (all angles less than 90 degrees)
  • right angled triangle (one angle of 90 degrees exactly)
  • obtuse angled triangle (one angle greater than 90 degrees)

Remember that all the angles in a triangle always add to 180 degrees. The following links are to some interactive activities to investigate angles:

What’s my angle? from Ambleside Primary School.

Angle Activities from Ambleside Primary School.

Guess the angle from Crickweb.

What are the chances?


Learning Intention: Students will understand that the scale of probability ranges from zero (impossible) to 1 or 100% (certain). They will be able to calculate simple probabilities by working out the number of desired outcomes divided by the total number of outcomes. Students will use tables and tree diagrams to work out the number of possible outcomes.

Success Criteria: You will be able to draw a probability scale, labeling it with different examples that are impossible, very unlikely, unlikely, 50:50, likely, very likely and certain. You will use coins, dice, spinners, cards and other tools to calculate the probability of various outcomes. You will use tables and tree diagrams to assist you to calculate the number of possible outcomes. For example; Annie throws a fair coin and a six sided dice. How many possibilities are there? How many of these are Heads and Even?

BBC Bitesize: Probability

Maths is Fun: Probability

Probability Games

National Library of Virtual Manipulatives: try Coin Toss and Spinners.

Fibonacci Series

One of my favourite Maths lessons is about the Fibonacci series, using the YouTube video “Nature by Numbers“. Firstly, I ask students to add 0 and 1 and then the two previous numbers to make a sequence. 0, 1, 1, 2, 3, 5, 8, 13, 21, 34, 55, 89 etc. All students are capable of this, even if some use a calculator.
I then show students the video and we discuss all the examples from nature that show the Fibonacci sequence. We search for examples on Flickr – sunflowers, pine cones, succulents and nautilus shells. Although some people claim this is spooky, the pragmatist in me believes that nature exhibits this sequence as it is the most efficient way to pack objects (leaves, petals, seeds, she’ll compartments) into a small space.
If we divide each number in the sequence by the number before, the answer approaches what is called “phi” or the golden ratio, approximately equal to 1.618. Now we can discuss how this ratio was used by ancient Greeks, Euclid and perhaps even Leonardo da Vinci in the “Vitruvian Man”. Many architects, artists, photographers and others believe that this ratio represents the perfect proportion to render the subject most beautiful.

Phi and the Golden Ratio in Art

Golden Ratio in Art and Architecture

Fibonacci Numbers in Nature

Year 7 Favourites

favouritesImage Source

Learning Intention: Students will understand how to collect data using a tally and create a frequency table and bar graph using the data. They will understand how to convert fractions to decimals and percentages. They will create a pie chart using this data by converting 100% to 360 degrees.

Success Criteria: Each student will produce a poster that includes a frequency table (including fractions, decimals and percentages), bar graph and pie chart of their chosen data, collected from the Year 7 Maths Survey.

  1. First collect your data in tally form.
  2. Add each category and find the total.
  3. Represent each category as a fraction.
  4. Convert to a decimal (2/25 = 16/100)
  5. Convert to a percentage 16/100 = 16%
  6. Create a bar graph using this data
  7. Remember to add SALT to your graph – Scale, Axes, Labels, Title
  8. Turn your bar chart into a pie chart (multiply percentage by 3.6 because 100% = 360 degrees)
  9. Make sure you have a key to interpret your data.
  10. Add a beautiful title and colour to present your poster.
  11. Go to Create-A-Graph and use your data to check that your graphs are correct.
  12. Print out the computer generated graphs to add to your poster.